
Publish your first route
A Route is the policy that connects one or more public hostnames to an upstream service through an Ingress Node. Publishing a Route is a cross-team action: the application owner confirms the upstream and health behavior, the platform owner selects placement and traffic policy, and the DNS/TLS owner proves that clients will reach the correct endpoint securely.
The success criterion is an HTTPS request that resolves to the assigned Ingress Node, presents the intended certificate, reaches the intended application, and remains observable and reversible. Do not treat a saved form as successful publication.
Understand the resources involved
Section titled “Understand the resources involved”Gateway keeps the responsibilities separate:
- A Domain records the hostname and its Ingress placement.
- An SSL Certificate provides TLS material and renewal ownership.
- A Route defines forwarding, access, maintenance, and health behavior.
- An upstream is the application that receives the request. It can be a manually entered address, a Gateway-managed Docker resource reached through Secure Link, or a Pages deployment selected through a Tag.
This separation lets you change an application revision without recreating DNS or a certificate. It also means that all four pieces must agree before the route is production-ready.
Before creating the Route
Section titled “Before creating the Route”Confirm that:
- an Ingress Node is Online, owns the intended public service address, and can accept ports 80/443 where required;
- the application exists and responds on the selected scheme and port;
- the hostname is approved and its DNS owner is available;
- a matching certificate is active or there is a clear issuance path;
- the operator has permission to create the Domain, select the certificate, and create the Route;
- the expected health path, response status, WebSocket requirement, request limits, and access policy are known.
If the upstream is private, decide whether the Route should use a Gateway-managed Secure Link. A Secure Link carries traffic through the Relay data plane without publishing a normal host port solely for ingress. It does not repair an unhealthy application or bypass workload ownership.
Publish the Route
Section titled “Publish the Route”- Open Ingress > Domains and add the hostname.
- Assign it to the Ingress Node that will receive public traffic.
- Configure DNS through the Cloudflare integration or create the required external DNS record. Wait until the authoritative answer points to the intended service address.
- Open Ingress > SSL Certificates and issue, import, or select a certificate that covers the exact hostname or an appropriate wildcard.
- Open Ingress > Routes and choose Add Route.
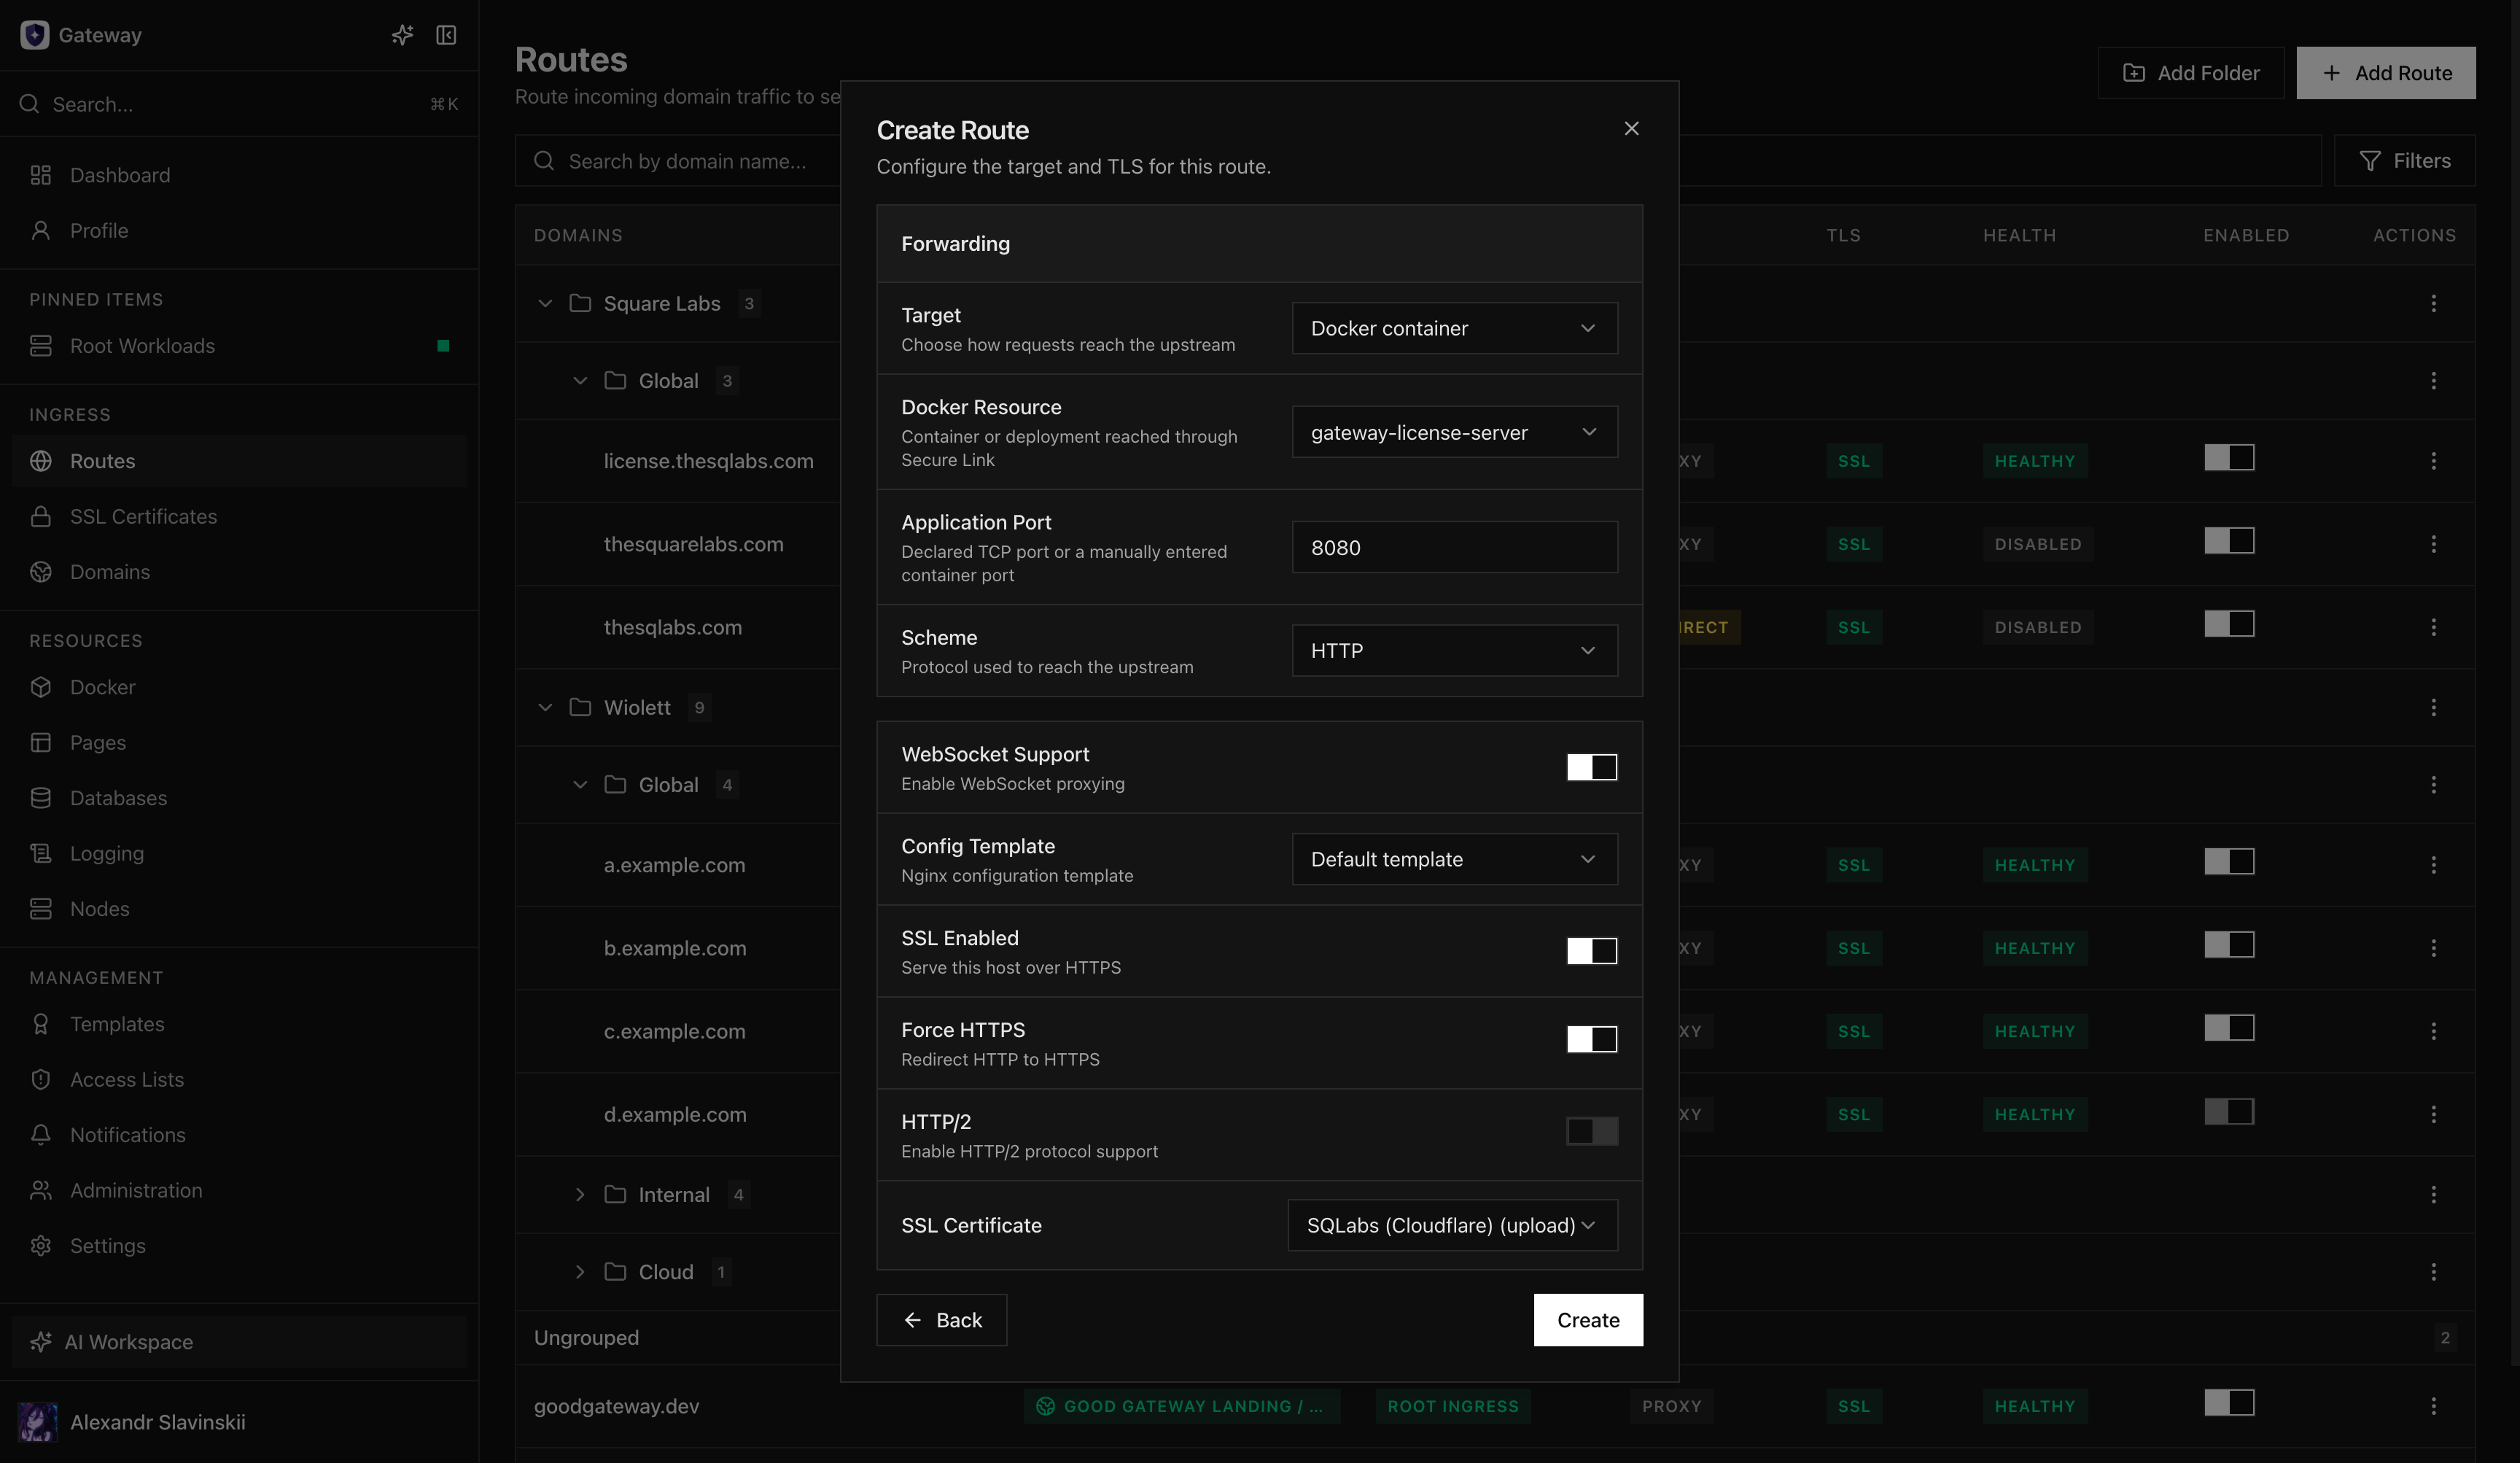
- Select the Domain and the forwarding target. For a managed Docker target, select the resource and the application port; Gateway owns the Secure Link lifecycle.
- Select HTTP or HTTPS for the upstream according to what the application actually serves. This setting is independent of public TLS termination.
- Enable public TLS and select the certificate. Enable Force HTTPS when plain HTTP should redirect rather than serve content.
- Enable WebSocket support only when the application uses upgrade connections. Apply an Access List, rate policy, or custom template only when the service requires it and the template is known to be compatible.
- Save the Route and wait for Gateway to render, validate, and apply the nginx configuration.
Verify the result
Section titled “Verify the result”User-facing checks
Section titled “User-facing checks”- Public DNS resolves to the assigned Ingress address from more than one network.
- The HTTPS response presents a trusted certificate that covers the hostname.
- The expected application page or API response is returned.
- HTTP redirects to HTTPS when Force HTTPS is enabled.
- Browser login, callbacks, streaming responses, and WebSockets work when the application uses them.
Gateway checks
Section titled “Gateway checks”- The Route is enabled and its health state matches a direct application check.
- The displayed target is the resource and port you intended, not a stale container or manual address.
- The Ingress Node reports a valid applied nginx configuration.
- Access/error logs show the test request and no repeated upstream failures.
- Secure Link runtime is healthy when the target uses it.
- Access List and rate controls admit and reject the expected clients.
A green application response does not prove that policy is correct. Test one allowed and one denied path when access controls are present, and test a WebSocket connection rather than only the initial HTTP handshake.
Failure modes and recovery
Section titled “Failure modes and recovery”DNS resolves incorrectly: correct the authoritative record and wait for normal cache expiry. Do not change the Route target to compensate for a DNS error.
Certificate is rejected: verify hostname coverage, chain, validity period, and deployment to the selected Ingress Node. Do not disable TLS verification in clients as a workaround.
Gateway cannot apply nginx configuration: inspect the validation error before retrying. A custom template, incompatible option, duplicate hostname, or unavailable managed target can make the desired configuration invalid. Gateway retains ownership of the last applied state; correct the input rather than editing generated nginx files directly.
Secure Link target is unavailable: verify that the workload and relevant Nodes are online and that Relay is healthy. Publishing a container port as an emergency workaround changes the security model and should be a deliberate, reviewed change.
A bad release is live: enable Route maintenance when appropriate or move the upstream back to the last known-good Deployment, image digest, Compose revision, or Pages Tag. The Route and certificate normally do not need to be deleted for an application rollback.
For a deeper explanation of private targets, continue with Secure upstreams. For a complete workload-to-public-URL workflow, use Publish an application.